How to deploy a NodeJS web server to AWS

Prerequisites
An AWS account
A web server application that you want to host (we’ll use NodeJS for this tutorial).
sshinstalled on your personal computer
Steps
Create a VPC
VPC = Virtual Private Cloud, a software-defined network that isolates your use of AWS resources from that of others.
Pick the region you want to run your service in (e.g., us-east-1, us-west-2)
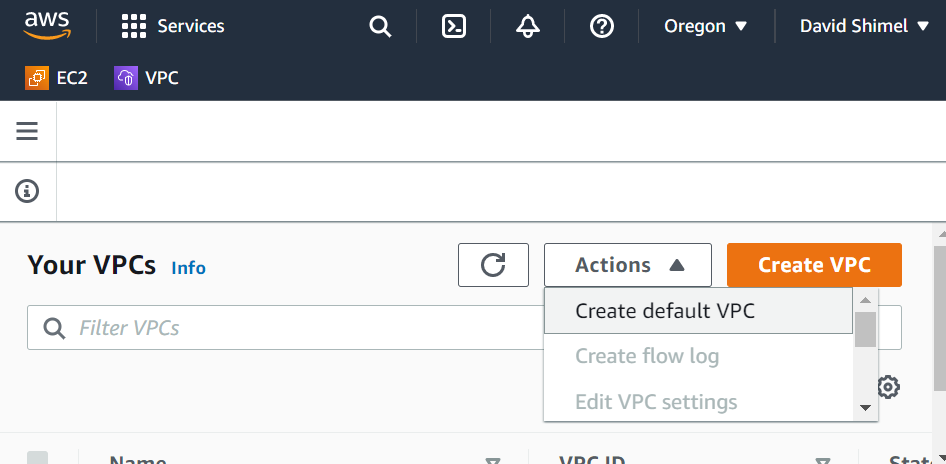
Go to the VPC section of AWS, click the “Actions” dropdown, then click “Create default VPC”.
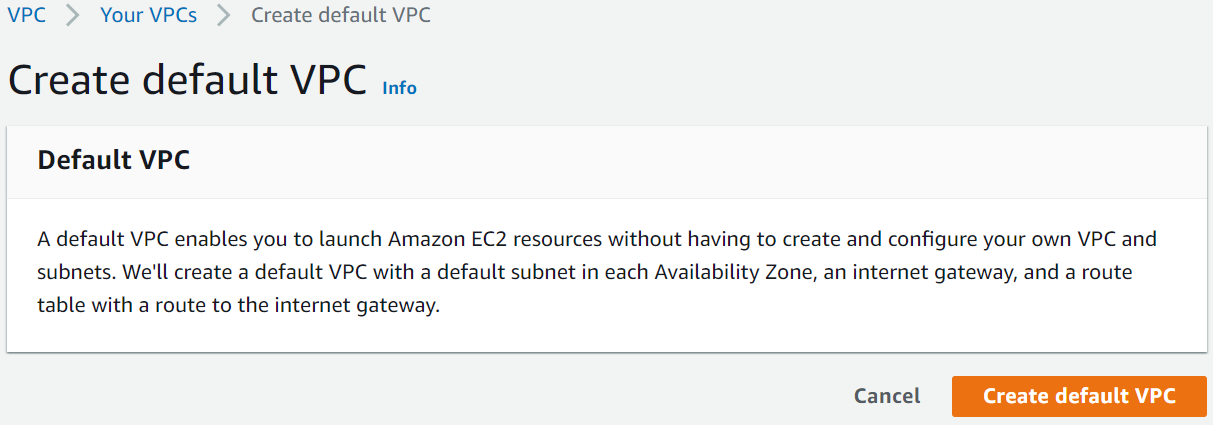
On the next page, click the “Create default VPC” button.
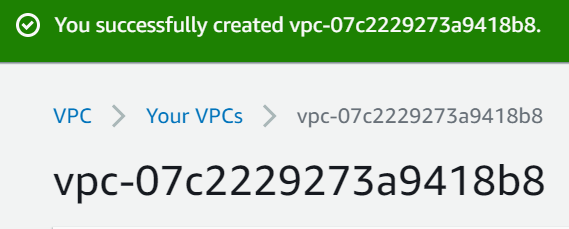
You will see a confirmation.


Create an EC2 instance
EC2 = Elastic Cloud Compute, provides virtual machines with various tech specs that you can use to run your code.
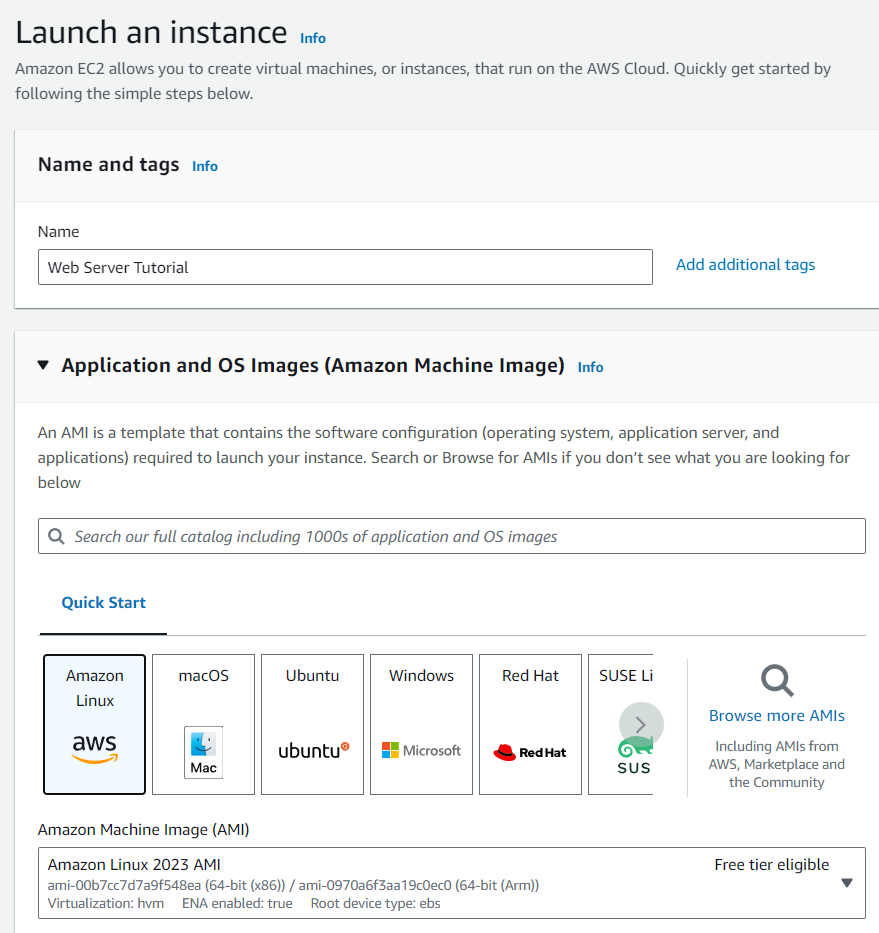
Go to the EC2 page and click Launch Instances.

Name the instance and leave the machine image as the default, Amazon Linux.
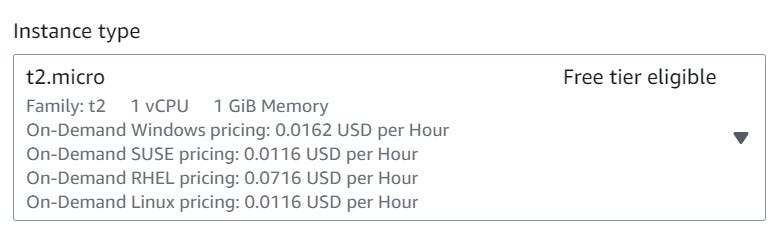
Choose an instance type (the default, t2.micro, works fine and is free-tier eligible).
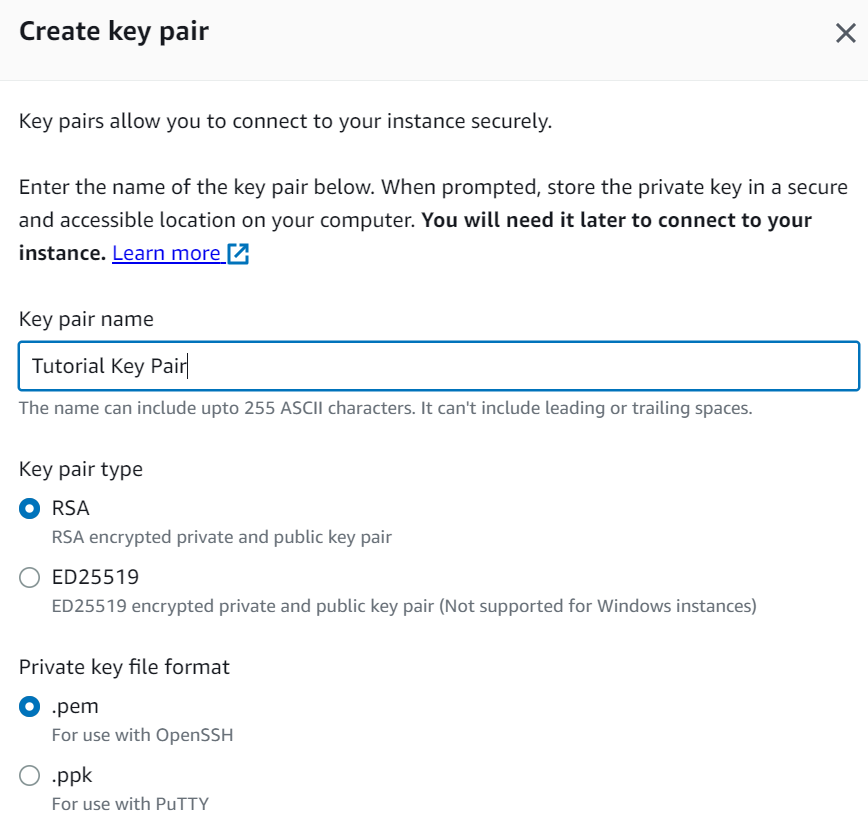
Create a key pair so you can connect to the instance via SSH. Your computer will download the PEM file when you click Create.

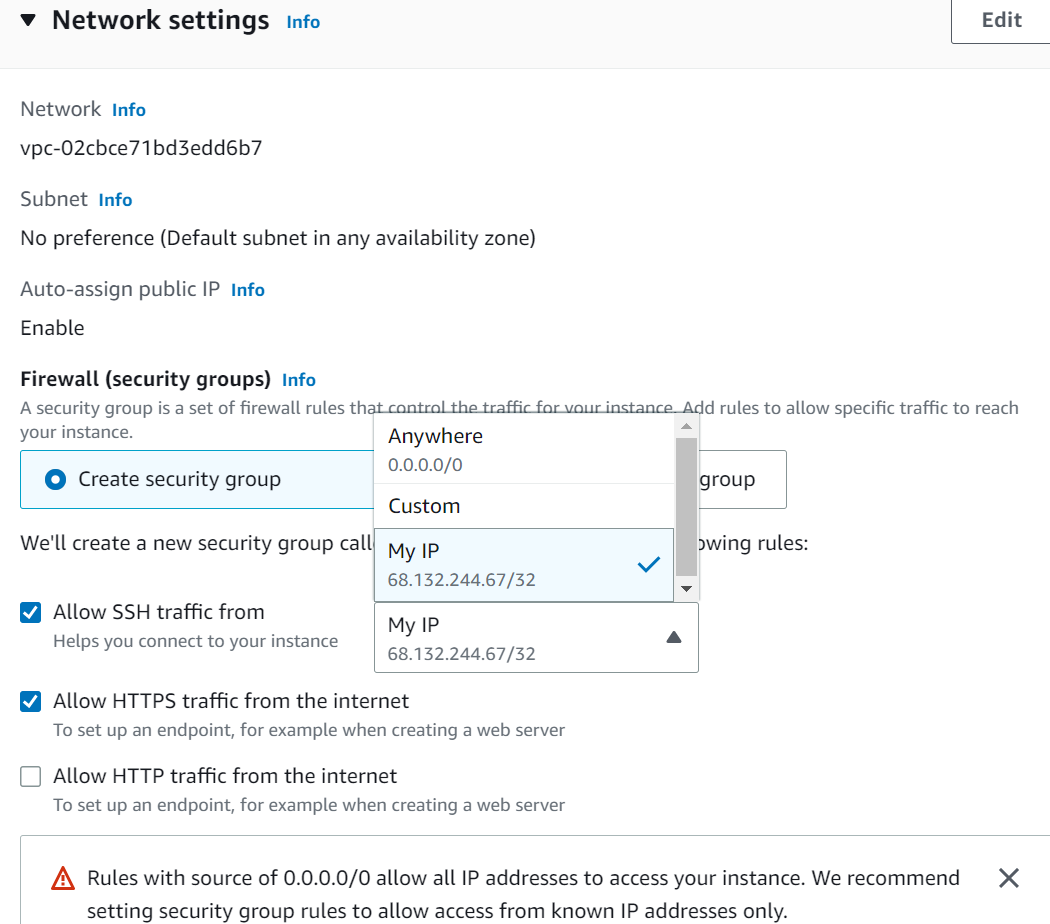
In Network Settings, create a default security group that will allow SSH traffic from your IP address only. Also check the box to allow HTTPS traffic from the Internet (note: you wouldn’t do this if you were launching multiple EC2 instances behind a load balancer).
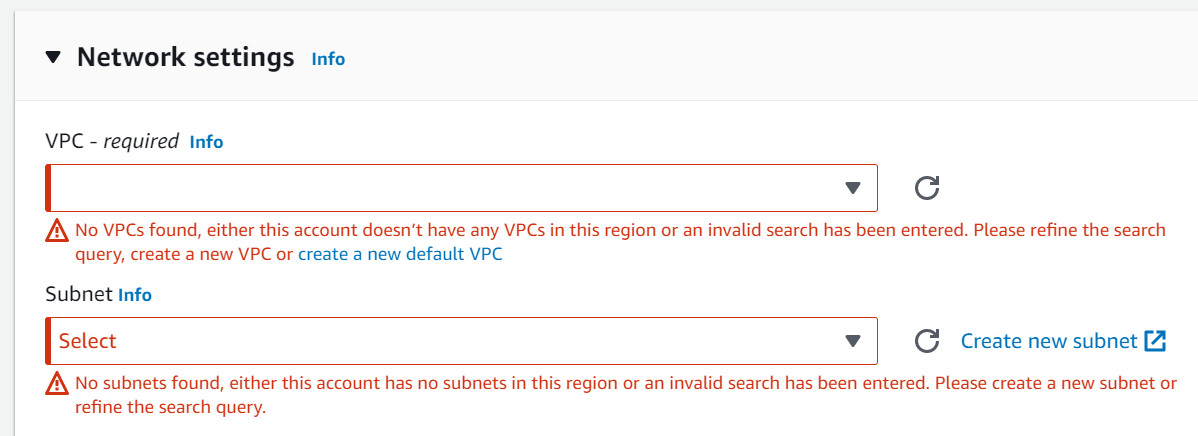
Click Launch Instance. Note: if you don’t already have a VPC for the region in which you’re launching the EC2 instance, you will see an error:
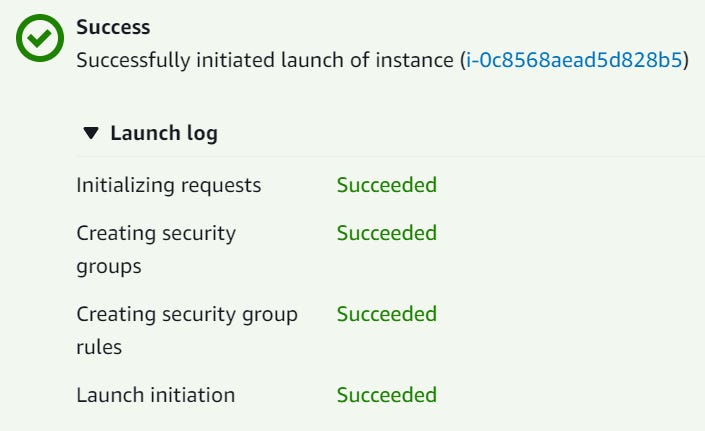
If you do already have a VPC, you’ll see a confirmation message showing that you successfully launched the instance.
Once the instance is running, you can SSH into it.
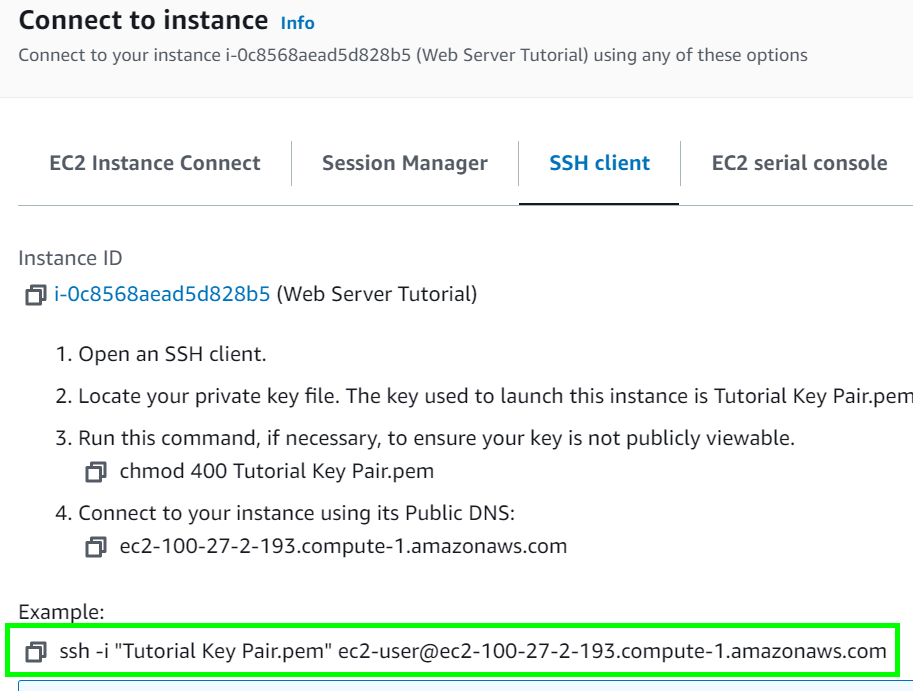
ssh -i "Tutorial Key Pair.pem" ec2-user@ec2-100-27-2-193.compute-1.amazonaws.comAfter connecting, run the following terminal command to get the latest software packages for your instance:
sudo yum update


Install NodeJS on your instance
Install NVM:
curl -o- https://raw.githubusercontent.com/nvm-sh/nvm/v0.39.3/install.sh | bash“Activate” nvm by running the following command
. ~/.nvm/nvm.shInstall Node version 16 (because Amazon Linux 2 does not currently support later versions):
nvm install 16
Create “Hello World” web server in Node and run it
Based on https://nodejs.org/en/docs/guides/getting-started-guide/
Create a directory for the web server:
mkdir web-server-tutorialGo into that directory
cd web-server-tutorialCreate a file for the server code
nano app.jsPaste the code from the Getting Started guide into nano. Make sure to change hostname to
'0.0.0.0', otherwise the Node server will not be able to listen to connections coming from outside the EC2 instance.
Save and exit nano.
Run the node server:
node app.js
Press Ctrl+Z to put the node process in the background, then run the command
bgto resume the process so you can exit the terminal session without your web server going down.


Allow Internet traffic to port 3000 of your instance
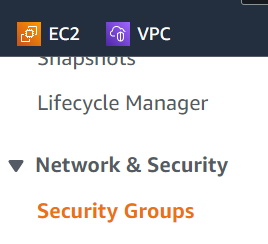
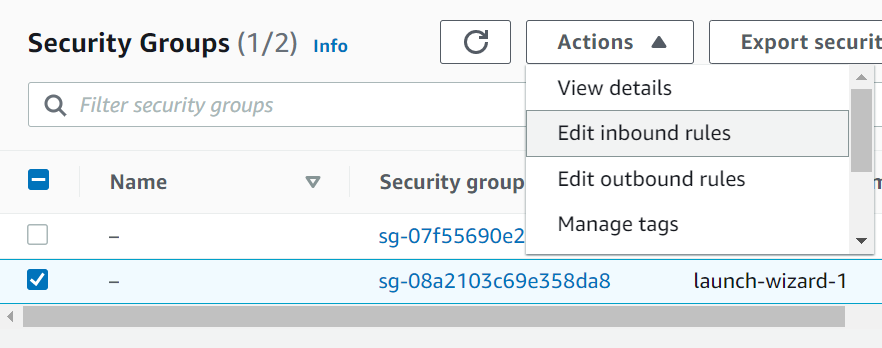
Go to the EC2 dashboard, then click “Security Groups” under “Network & Security”
Select the launch-wizard-1 security group, then select “Edit inbound rules” from the “Actions” dropdown.
Add a “Custom TCP” rule, set “Port range” to 3000, and select “Anywhere - IPv4” in the “Source” dropdown.

Click “Save rules”
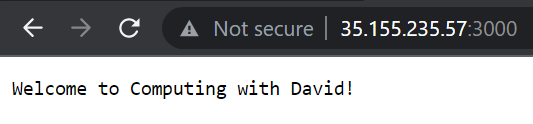
Now you can see your web server running by navigating to the IP address with the given port in a web browser, e.g.
http://35.155.235.57:3000/